Hi all!!
I adore false lashes as they can really add some drama to a makeup look where eyes are the focus of the look, e.g. a smokey eye, heavy liner, bright or vibrant colours, bridal or formal occasion looks.
I know so many people who love the look a good set of well applied lashes can create but are scared off by either the difficulty of applying them, the fear of looking like a drag queen (!), the fear of lashes falling off half way through the day or evening or the fear of pulling off your own lashes by accident when trying to remove the false lashes!
There are a few things to note when looking for and applying false lashes:
1. Quality of the lashes is important. Unless you are trying to go for a very dramatic look with feathers, sequins or diamante, where the look is for an obviously fake lash, you really need to look at the quality of the lash. Human hair lashes are particularly realistic looking and cost a little bit more than synthetic lashes.
2. Also, look at the band, i.e. the part of the lash that is going to stick to your eyelid. Ideally, a clear or black very thin and flexible band is what will ensure the lash moulds easily to your eye shape and also ensures that it is unnoticeable against your eyelid so that the lashes do not look fake.
3. The quality of the glue is very important. So many lashes come with a little tube of glue which is frankly, useless! The best lash glue is a brand called Duo glue which is a surgical adhesive. It dries fairly quickly to a nice gummy texture which can be removed easily yet grips your lashes instantly. You can purchase this glue online or at MAC. Other glues do not dry as quickly which means there is more time for the lash to slip around and also does not have the same hold as Duo glue. I highly, highly recommend purchasing this glue it will make ALL the difference. I bought my tube for 8 pounds but I have seen it on Ebay for cheaper. It lasts a very long time so it is worth the money.
4. When applying the glue to the lashes, you must let the glue dry for around 40 seconds before applying the lashes. This ensures that the glue is slightly tacky so that there is a fair amount of grip onto your eyelids immediately upon contact so that the lashes do not slip around.
5. For newbies or people with sensitive eyes or if you just want a very natural look, my advice is to try the half or demi lashes. My favourites are the number 20 lashes from MAC 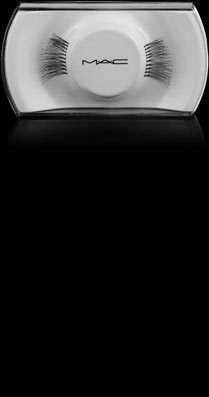
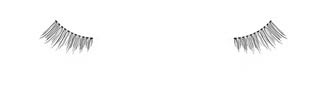
As you can see from the above picture these are wispie, natural looking half lashes which only go on the outer corner of your eyes. The shortest lash does need to match your natural lashes somewhat so if you have very short or sparse lashes, these are probably not for you. MAC lashes have shot up in price to 10 pounds I believe! So, for a fantastic affordable dupe, try Ardell Accents number 301 which are available at Boots or online, see pic below:
6. As discussed above, if you do have particularly short or sparse lashes and you do not want a full set of lashes, you can either try the individual lash flares, or get a false full set lash which are shorter at the start and get longer towards the outer corner. Then simply measure the point from which the false lashes are the same or similr length to your lashes in the centre of your lid, measure the length out to the outer edge of your eye, and cut the lashes to fit.
7. As for how to apply lashes, there are a fair few ways of applying lashes, and I will very shortly prepare a video tutorial on how to do so. For me the easiest way is to look straight at the mirror, hold the lashes with a tweezer or a lash applicator (I will tell you all more about this nifty little tool shortly also!) and slide the lashes up my natural lashes so that they stick at a natural angle. There are a couple of other methods which you may find easier so as I said, watch out for my video tutorials which are coming very soon!!
Hope that helps!
xoxo Angel5ace xoxo

No comments:
Post a Comment